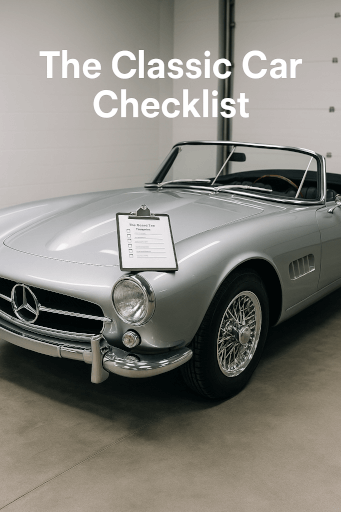
The dream of owning a piece of automotive history is a powerful one. But for many, that dream is shadowed by the fear of making a costly mistake—of buying a beautiful machine that hides a world of mechanical and structural problems. This is where the joy of ownership can turn into a source of anxiety and financial strain.
This guide is different. It is not another basic list of tips. It is a master guide from the professional technicians at SAS, designed to unify the entire ownership lifecycle. We are distilling decades of our hands-on experience into one definitive, trustworthy document that covers everything from the critical pre-purchase inspection to the meticulous details of ongoing maintenance and long-term preservation. While other resources might cover buying or maintenance, this is the first expert-led resource to combine them into a single, comprehensive checklist.
To provide immediate, actionable value, this article is the foundation for our exclusive, downloadable ‘SAS Master Checklist’ PDF—a tool you can take with you on your next inspection. It’s time to buy with confidence and own with pride.
Part 1: The foundation: mastering the pre-purchase paper trail and documentation
Before you ever touch the paint or turn the key, the story of a classic car begins with its paperwork. In our experience, a flawless-looking car with a flawed or incomplete history is a major red flag. Performing due diligence on the documentation is the very first step our own technicians take. It is the fastest way to identify a problematic vehicle and avoid wasting time on a car that should be disqualified from the start.
Verifying the vehicle identification number (VIN)
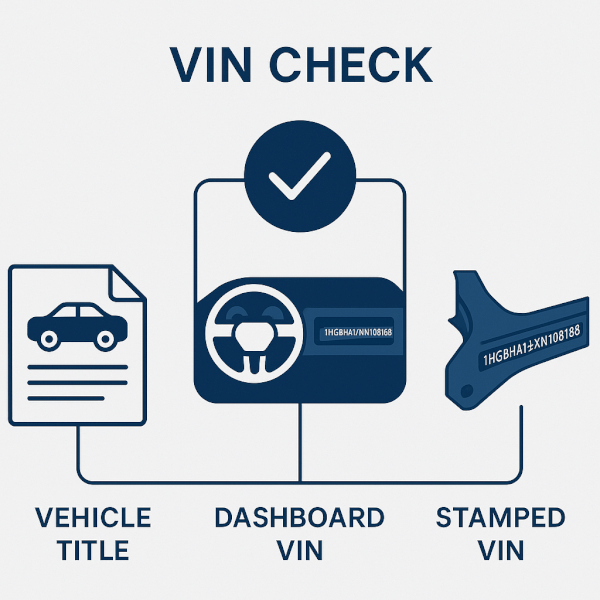
The VIN is the car’s legal identity. A mismatch can create severe complications for registration, insurance, and ultimately, its value. A professional three-point VIN check is non-negotiable.
- The Title: The VIN on the vehicle’s legal title must be your starting point.
- The Dashboard/Door Jamb Plate: Locate the manufacturer’s VIN plate, typically on the driver’s side dashboard, visible through the windshield, or on the door jamb. These two numbers must match perfectly.
- The Chassis/Frame Stamping: This is the most critical check. The VIN is physically stamped into the vehicle’s frame or chassis. Its location varies by make and model. This stamping must match the other two sources. Any sign of tampering with this number is a reason to walk away immediately.
Scrutinizing service records and ownership history
A thick binder of records is a sign of a cherished vehicle. When reviewing these documents, we look for a narrative of consistent care. Pay close attention to records detailing major work like engine rebuilds, transmission servicing, or significant suspension work. A documented ownership history, or provenance, further establishes the car’s pedigree and the quality of its stewardship over the years.
Key questions to ask the seller:
- “Are there any recurring issues noted in the service history?”
- “Can you walk me through the timeline of major services?”
- “Is there a gap in the service history, and if so, why?”
Assessing restoration documentation and authenticity
For a car marketed as “restored,” documentation is everything. Without it, you must assume the worst about the quality of the work. Insist on seeing photo documentation of the restoration process. A professional restorer will have photographed the car before work began, during the disassembly, at the bare metal stage, and throughout the reassembly. These photos are your only proof that high-quality metalwork was performed instead of simply covering rust and damage with body filler. This level of scrutiny is essential and directly counters the lack of technical depth found in many buyer’s guides.
Part 2: The physical inspection: a systematic guide to body, chassis, and mechanicals
With the paperwork verified, it’s time for the hands-on inspection. This is where professional expertise makes the difference between buying a gem and a nightmare. While foundational resources like Hagerty’s Collector Vehicle Inspection Basics are useful, this guide provides a deeper level of technical detail drawn from our workshop experience.
The body and chassis: hunting for rust and hidden damage
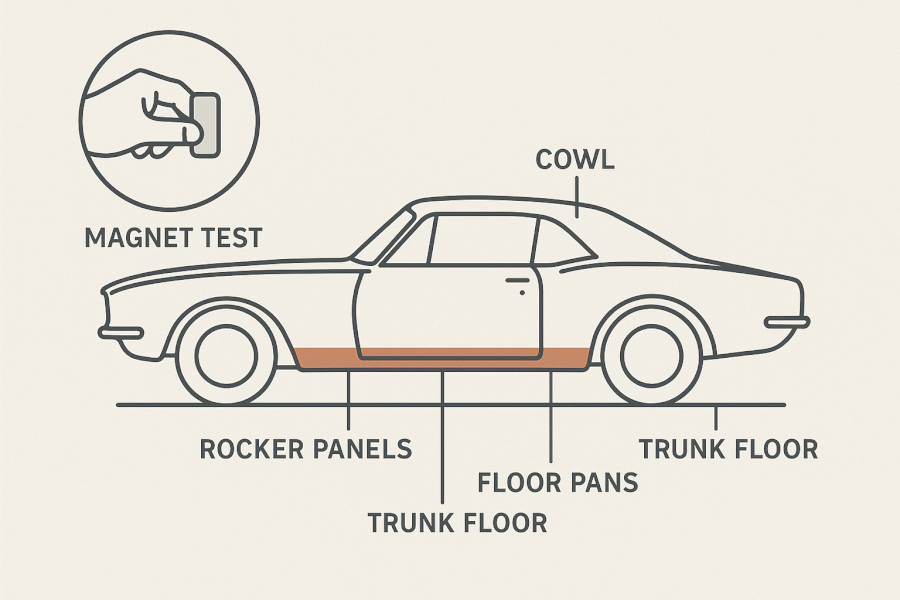
Rust is the eternal enemy of the classic car. Go beyond a casual glance and examine the common moisture traps with an inspector’s eye. Pay special attention to:
- Rocker panels (below the doors)
- Floor pans (under the carpets)
- Trunk floors (especially in the corners and under the mat)
- Cowl vents (at the base of the windshield where leaves and debris accumulate)
To address the common pain point of hidden damage, use the “magnet test.” Take a small, weak magnet (like one from a refrigerator, wrapped in a soft cloth to protect the paint) and run it along the lower sections of fenders, doors, and rocker panels. If the magnet fails to stick, it indicates the presence of thick, non-metallic body filler, a sign of a previous repair that could be hiding rust or damage. Finally, check panel gaps between the doors, fenders, and hood. They should be even and consistent; uneven gaps can signify a past accident.
The heart of the matter: engine and drivetrain inspection
The engine bay tells a story of care or neglect. Start with a visual check for active fluid leaks. Look for seepage around gaskets (oil), check the condition of rubber hoses and drive belts (coolant), and inspect lines for brake fluid leaks. A key professional check is to look for “blow-by.” With the engine running, carefully remove the oil filler cap. A small amount of vapor is normal, but a heavy, continuous plume of smoke indicates excessive pressure escaping past the piston rings—a sign of a worn-out engine.
Always perform a cold start test. Listen for any loud knocks, clicks, or ticking noises when the engine first fires up, as these can indicate serious issues that may quiet down as the engine warms and oil circulates. During a test drive, pay close attention to the transmission, noting if it engages smoothly and shifts cleanly without hesitation or grinding.
Electrical system, tires, and wear components
Classic car wiring problems are a common and frustrating issue that can even pose a fire hazard. Methodically test every electrical component: all exterior and interior lights, turn signals, dashboard gauges, and the horn. Look under the dash and in the engine bay for brittle, cracked, or poorly repaired wiring with excessive electrical tape.
Tires are a critical safety and performance component. Even if they have deep tread, rubber degrades over time. Check the four-digit date code on the tire’s sidewall; the first two digits represent the week and the last two represent the year of manufacture. Any tire older than 7-10 years should be replaced, regardless of appearance.
Interior and authenticity checks
The interior’s condition and originality heavily influence a car’s value, especially at a concours level. Check if the upholstery patterns, dashboard instruments, and switchgear are correct for the car’s year and model. A re-trimmed interior isn’t necessarily a dealbreaker, but it should be done to a high standard with period-correct materials. The search for ‘period-correct car parts’ is a major concern for serious collectors, and modern replacements can diminish the vehicle’s historical value.
Part 3: The living document: your ongoing classic car maintenance schedule
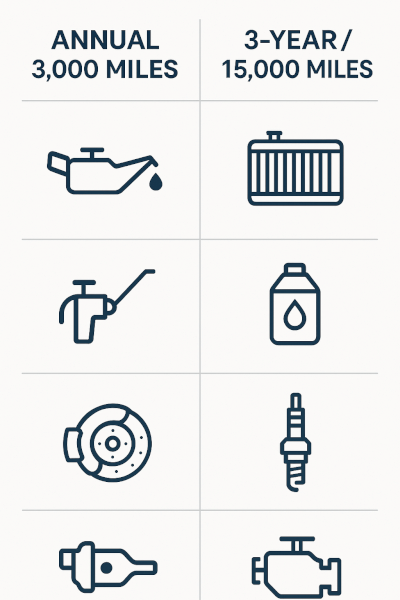
The journey doesn’t end at purchase; it begins. Shifting from buyer to owner means embracing a proactive maintenance philosophy. This is not a chore but the essential act of preserving a valuable asset, ensuring its reliability, and safeguarding your enjoyment. This ongoing classic car maintenance checklist is the key to a healthy car.
The 3,000-mile / annual service checklist
This is your frequent service interval for a car that is driven regularly.
- Oil and filter change: Use high-zinc or specialized classic car oils to protect older engine designs.
- Fluid level checks: Top off coolant, brake fluid, transmission fluid, and differential fluid as needed.
- Chassis lubrication: Grease all suspension and steering components that have grease fittings (zerks).
- Brake system check: Visually inspect brake pads, lines, and rotors for wear and leaks. Check fluid condition.
The 3-year / 15,000-mile service checklist
These tasks are less frequent but critical for long-term health.
- Coolant system flush: Completely drain, flush, and replace the engine coolant.
- Brake fluid flush: Bleed the entire system and replace the brake fluid to prevent moisture buildup.
- Ignition system service: Replace spark plugs, distributor cap, rotor, and points (if equipped).
- Valve adjustment: Check and adjust valve clearances (for applicable engine types) to ensure optimal performance.
Expert recommendations for fluids and parts
Generic advice is not sufficient for these specialized machines. Classic car engines require higher viscosity oils with a ZDDP (Zinc Dithiophosphate) additive to prevent premature wear on flat-tappet camshafts common in older designs. For the fuel system, using ethanol-free gasoline is highly recommended. The ethanol in modern pump gas can corrode older rubber and metal fuel system components. If unavailable, use a quality fuel additive designed to counteract the effects of ethanol. These practices align with the official FIVA international guidelines for historic vehicles, which emphasize maintaining roadworthiness through proper, period-sensitive care.
Part 4: The preservation plan: best practices for long-term and seasonal storage
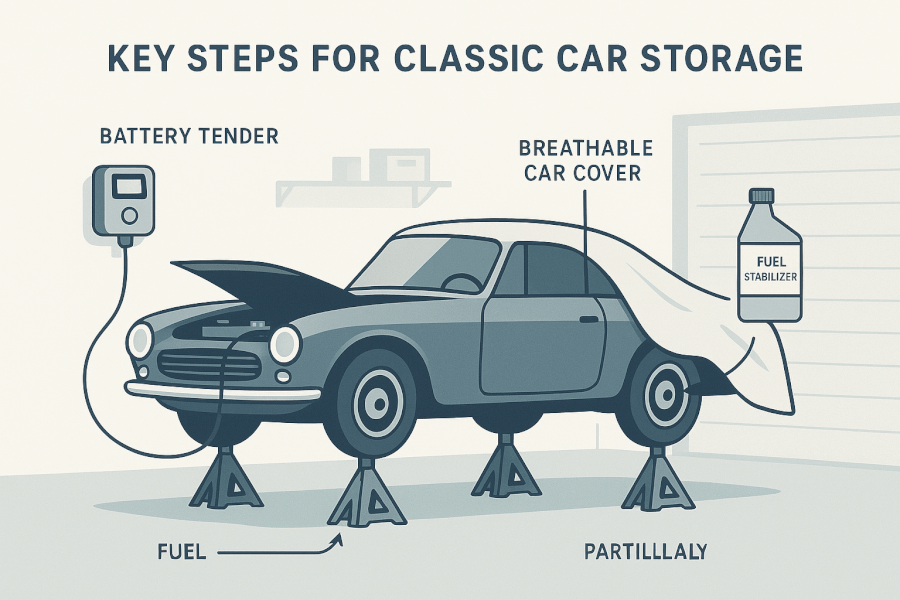
Proper storage is the final pillar of responsible classic car ownership. It’s a critical step to prevent the slow decay that can happen when a car sits idle. This plan, incorporating expert tips for long-term car storage, will ensure your vehicle emerges from hibernation in the same condition it entered.
Preparing the fuel system and engine for hibernation
You have two expert-approved methods for the fuel system. The most common is to fill the fuel tank to 90% full and add a high-quality fuel stabilizer. This prevents moisture from condensing inside the tank, which would cause rust. The alternative, for very long-term storage, is to have a professional completely drain the tank and fuel lines. You must change the oil and filter before storage. Used oil contains contaminants that can become corrosive and damage engine internals over time.
Protecting the battery and tires
The most common classic car battery drain solution is a quality battery tender or maintainer. This device provides a low-voltage charge that keeps the battery topped off without overcharging it, ensuring it’s ready to go when you are. To prevent tire flat spots from storage, inflate the tires to a higher pressure than normal (e.g., 45-50 PSI). For the best result, use four jack stands to take the weight completely off the tires, allowing them to rest unloaded.
Choosing the right environment and preventing pests
The ideal storage environment is a dark, dry, and, if possible, climate-controlled space to prevent temperature and humidity swings. Pests can cause significant damage to wiring and upholstery. Take simple, effective preventative measures: place steel wool in the exhaust pipe tips (remember to remove it before starting!), and use mothballs or cotton balls soaked in peppermint oil inside the cabin and around the vehicle’s perimeter. Finally, invest in a high-quality, breathable car cover. Avoid plastic tarps, which trap moisture and can ruin paintwork.
Key takeaways: your classic car ownership master plan
For quick reference, here is the SAS master plan in summary:
- Inspect with precision: Always start with documentation before moving to a systematic, hands-on inspection of the body, chassis, and mechanicals.
- Verify authenticity: A car’s value is tied to its originality. Scrutinize VINs, service records, parts, and restoration history.
- Maintain diligently: Follow a recurring maintenance schedule using classic-specific fluids and parts to preserve reliability and value.
- Preserve intelligently: Proper long-term storage preparation is non-negotiable to prevent deterioration from fuel, battery drain, and pests.
Frequently asked questions about classic car inspection and care
What should I look for when buying a classic car?
First, verify all documentation like the VIN and service history. Then, conduct a thorough physical inspection focusing on rust in common areas like rocker panels and floor pans, check for mechanical soundness with a cold start, and assess the originality of parts and the interior.
How do you prepare a classic car for winter storage?
Fill the fuel tank and add a stabilizer, change the oil, connect the battery to a tender, overinflate the tires or use jack stands to prevent flat spots, and place the vehicle in a dry location with pest deterrents and a breathable cover.
How can I tell if a car has hidden rust or body filler?
You can tell by using a small magnet on common repair areas like lower fenders and rocker panels; if the magnet doesn’t stick, it indicates the presence of non-metallic body filler. Also, look for bubbling paint, inconsistent panel gaps, and check underneath carpets.
How often should a classic car be serviced?
A classic car should have its oil, filter, and fluids checked annually or every 3,000 miles. A more comprehensive service including flushing coolant and brake fluid, and checking the ignition system, should be performed every 3 years or 15,000 miles.
Is buying a classic car a good investment?
Buying a classic car can be a good investment if you purchase the right car at the right price and properly maintain it. The key is to buy a well-documented, rust-free example of a desirable model, as restoration and repair costs can quickly erase any potential appreciation.
Confidently secure your piece of automotive history
Owning a classic car should be a source of joy and pride, not a journey filled with anxiety. This guide is designed to empower you with the professional knowledge to buy with absolute confidence and maintain your vehicle flawlessly. The SAS approach provides a single, unified resource that respects your passion and is dedicated to protecting your investment. You now have the framework used by experts to evaluate, service, and preserve these rolling sculptures.
Ready to perform your next inspection like a professional? Download the complete SAS Master Classic Car Checklist PDF now—your comprehensive companion for every step of the journey.
